


If you have been thinking of starting your own website, let it be a blog, or a portfolio, or a website for your business for a long time, but never gave it a try because:
- You think it’s time consuming.
- Making a website is for geeks and developers and you cannot do it.
- It’s too costly to own a website
I will prove all those hypothesis wrong in this article, and will guide you step by step, in order to build your own website from the scratch. One does not need to have any knowledge of coding for making his/her website these days.
For creating your own website, there are 3 steps which one has to follow:
#Steps to Make Your Own Website In Couple Of Hours
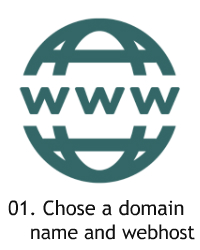
Step #01: Chose Your Domain Name and Hosting Service:
To take your website online, one needs to have couple of things:
- A Domain Name (www.domain.extension [eg: www.inquisitiveone.xyz])
- A Host (The Service to make your website with a domain name online)
So, if anyone thinks making a website is costly, no its not because this is the only step in all 3 steps where one needs to spend money, and that too a very minimal amount of $3-$5(₹99/month).
The Domain name should be chosen wisely, because it is something which will represent your business, if it is for a business website, or it should be something which should define about your blog, and one should try to go for very popular extensions for the domain like: .com, .co.in, .org, etc.
Having your own hosting helps in loading your websites quickly, and a lot of control access which will help in better SEO, loading time for the website, etc.
Where to get Domain Name and Hosting Plan?
I am currently using GoDaddy Hosting service, and they are pretty good, I have also used BlueHost in the past and their service is also good but not better than GoDaddy if you are in India. If you are in any other Country than India, I would suggest you to go for Bluehost service and if you are in India, I will recommend you to go for GoDaddy.
I have done a detailed review of Top 5 webhosting plans, you can click here to see the detailed review. For Indian reader I would suggest you to to go through Top 5 WebHosting plans in India article by clicking here.
You can check Bluehost plan. (Click at the banner to see their plans)

If you chose to go for GoDaddy Webhosting plan (Click at the banner to check their detailed plan):
There are some reason to go for BlueHost WebHosting:
- It is recommended hosting service by WordPress itself.
- They offer very decent pricing for webhosting, which starts from $2.75/month.
- When you buy Webhosting from BlueHost you get a free domain and a site builder, so that is absolutely a thumps up.
- They do have a very good 24/7 Support and their up time is 99.9%, so that is a very decent figure.
My suggested WebHosting for you will be BlueHost but you can try any WebHosting Service, you can check this article for other Top Hosting Service Providers.
How to Chose the Domain name?
Your Domain name should have following qualities:
- Brand : It should be a brand name for your website, and should represent the motive behind your website. For eg. A domain name for a pasta selling website should be something like onlinepasta.com, etc.
- Easy to remember: You may not forget the name of your website because its your’s but to help your customers or readers discover you easily you should keep the same simple and meaningful.
- .com Extension: You should try to first get .com extension with your website as it is still used by 75% of the websites available. As in my case inquisitiveone.com was premium domain and was too costly so I went with .in and .xyz extension.
Other benefits you get when you buy a Domain Name and Host:
So by now if you have bought your hosting plan and Domain Name, you will get other benefits like some limited amount of emails with you domain name. Eg. you@yourdomain.com . So suppose your domain name is inquisitiveone.in, you can make email addresses like prateek@inquisitiveone.in, etc.
By the end of Step #1, you should have a domain name and a host.
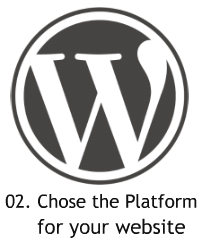
Step #2: Chose the Platform for your Website:
Since in this article we are discussing how to make your website using WordPress, we will be talking about WordPress only. But I will try to tell you what I mean by platforms. One can either do complete coding for the website he/she is building, which will require Front-End Development skill or can use a CMS (Content Management System), such as WordPress, Joomla, Drupal, etc. The 3 CMS mentioned are the some popular CMS’s, but WordPress is the most famous one and I would recommend for any beginner.
Drupal is pretty complex CMS and I would not prefer it for the beginners. Joomla is similar to WordPress but still need some level of experience with coding and also does not have a large community support like WordPress. One can build any level of complex website using WordPress, it is being used by large E-Commerce websites to small blogger because of its power,scalability and ease of use.
Some features of WordPress are:
- #1. Its completely free, with a very big community support.
WordPress is free to use, and because of its popularity it has grown to a very big community where you find a lot of people contributing to its betterment.
- #2. Simplicity.
Simplicity makes it possible for you to get online and get publishing, quickly. Nothing should get in the way of you getting your website up and your content out there. WordPress is built to make that happen.
- #3. Search Engine Optimized.
WordPress is optimized for search engines right out of the box. For more fine-grained SEO control, there are plenty of SEO Plugins to take care of that for you.
- #4. Easy Installation and Upgrades.
WordPress has always been easy to install and upgrade. If you’re happy using an FTP program, you can create a database, upload WordPress using FTP, and run the installer. Not familiar with FTP? Plenty of web hosts offer one-click WordPress installers that let you install WordPress with, well, just one click!
And there are many which I would like you guys to explore and write on your very first website after completing this article.
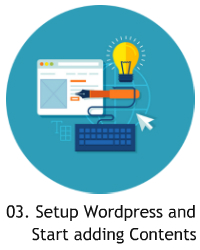
Step #3. Setup WordPress and Start Adding Contents:
By this time, you all must have a domain name and webhosting plan from BlueHost(recommended) or some WebHosting service provider. To install wordpress for your domain name, you can either call 24/7 customer care of your hosting service provider or install Worpress with just one click.
I will be discussing how to install WordPress with one click, I will be attaching pics of GoDaddy host service, you can follow the same for your host, most of the cpanel look the same.
- Login to your account, you can see My Products option, click on it.

- Click on the Manage option in the WebHosting option.

- You will get list of all your hosting accounts, click on the Manage option of the hosting account you want to install WordPress in.

- Next, You will enter the cPanel, here you can find Application option, click on it.

- You will get access to lot of application which you can install in your account, but click on WordPress.

- Then you will be required to fill few details which will be specific to your website, and once all details are done and WordPress is installed , you will be able to access your website using the domain name you registered for your website.
Congratulation!!! Now you have a website, with a domain name and host, installed with wordpress in it.
What’s Next???
Now you have all the things to get started with your own website. You can now enter the url of your domain name with /wp-admin to go into the wordpress dashboard. Eg. www.inquisitiveone.in/wp-admin. Where you will be asked to enter the username and password, enter the same what you must have entered in the very last step of installing wordpress.
Once done. Welcome to the WordPress Dashboard of your website.
I will be writing a new article to tell you how to start adding contents to your website through WordPress, How to install awesome themes in wordpress, Top wordpress themes, How to install plugins and what are their benefits, how to make money online using your blog’s traffic, etc.